


Setting up a live soundboard or home studio console requires a clear understanding of your signal path before pushing any faders. Knowing how to connect active speakers to mixer hardware prevents unwanted hum, sudden signal distortion, and potential hardware overload. Unlike passive cabinets that depend on external power amplifiers, active speakers house their own internal amplification modules that expect line-level audio signals. Plugging an amplified output directly into powered cabinets can permanently damage sensitive input circuits. Selecting the right physical connections helps you maintain proper headroom while routing clear stereo audio directly to your monitors.
Many audio enthusiasts switch between compact studio monitors, portable PA gear, and traditional stereo loudspeakers depending on the acoustics of their listening space. Connecting powered enclosures to a soundboard usually involves balanced XLR connections, balanced quarter-inch TRS jacks, or stereo breakout adapters. Matching your mixer main outputs to the inputs on your powered boxes delivers clean gain staging from start to finish. Once you grasp the basic principles of balanced signal flow and safe power sequencing, managing any live or recording setup becomes straightforward.



Mastering the Signal Path: How to Connect Active Speakers to Mixer Consoles
Connecting active speakers to an audio mixing console requires running unamplified line-level audio cables from the mixer main outputs into the dedicated line inputs of the powered cabinets. Because active speakers feature built-in power amplifiers, they must never receive high-voltage speaker-level signals from an external power amplifier. Using balanced XLR or quarter-inch TRS connections ensures that the audio signal remains free from extraneous noise and electrical hum across longer cable distances. Once the physical lines are securely fastened, following a disciplined power sequence and establishing balanced gain staging keeps your sound system safe and transparent.
Understanding Active Architecture Versus Passive Systems
Active speakers, often referred to as powered speakers, contain integrated power amplifiers engineered specifically to drive their internal woofer and high-frequency components. This design contrasts sharply with traditional passive systems, which rely on external rack-mounted amplifiers to supply high-voltage speaker wattage. In an active setup, the crossover split occurs before amplification, allowing internal limiters and processing circuits to protect the drivers. Because the amplification takes place inside the cabinet enclosure, the speaker only expects a line-level feed from your soundboard.
Connecting a powered mixer output directly into an active speaker represents a serious hazard to internal circuitry. Powered mixers send high-voltage wattage intended for passive voice coils, which will quickly overwhelm the sensitive line input stage of a powered monitor. Passive mixers, by contrast, output standard line-level audio that matches the operational thresholds of active cabinets. Verifying that your console sends an unamplified signal is the most critical safety check before running any audio cables.
Locating the Correct Mixer Outputs and Speaker Inputs
Most mixing consoles feature dedicated stereo outputs labeled as Main Out, Master Out, or Stereo Mix. On professional soundboards, these outputs typically appear as male three-pin XLR connectors or balanced quarter-inch TRS jacks. Smaller desktop boards or submixers might offer unbalanced RCA outputs or stereo mini jacks for secondary monitoring. Inspecting your mixer rear or top panel reveals which connection format delivers the primary stereo master bus.
Active speakers generally feature combination input jacks that accept either standard three-pin male XLR plugs or quarter-inch TRS connectors. Many modern powered cabinets also include a mic-and-line sensitivity switch located near the input gain potentiometer. Setting this switch to line level is necessary because the mixer output signal is already significantly stronger than a raw microphone feed. Leaving this input set to mic sensitivity will cause severe digital clipping, harsh distortion, and potential component overheating.
Selecting Appropriate Cables and Adapters for Balanced Audio
Balanced connections represent the industry standard for linking professional audio equipment because they actively reject electromagnetic interference. Standard XLR cables utilize three conductors consisting of a positive signal wire, a negative inverted signal wire, and a braided ground shield. As the audio signal travels down the line, common-mode rejection at the speaker input differential amplifier cancels out ambient radio interference and electrical hum. Running balanced cables allows audio engineers to span hundreds of feet between the console and front-of-house speakers without signal degradation.
When connecting auxiliary media sources, tablet computers, or secondary devices into a mixer or active cabinet, specialized breakout cables become essential. Adapters such as the BTSEURY 3.5mm to Dual XLR Female Cable or the Mingzhe 3.5mm to Dual XLR Stereo Cable 0.5m allow users to split unbalanced stereo auxiliary signals into separate left and right XLR feeds. These adapter leads provide a practical bridge when routing background music from portable players directly into mixer channel strips or active speaker pairs. Selecting durable metal connectors and flexible PVC jacketing helps maintain clean signal transfer during regular setup routines.
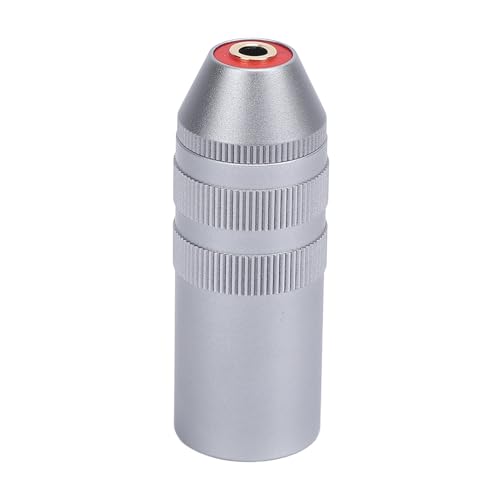
Specialized monitoring chains and headphone distribution systems occasionally require balanced format conversion. Adapters like the Jelquix 4 Pin XLR to 4.4mm Adapter or the Vistreck 4 Pin XLR Male to 3.5mm Balanced Female offer balanced signal routing across compact physical ports. While these four-pin adapters primarily serve dedicated headphone amplifiers or balanced monitoring rigs, understanding pinout configurations prevents accidental phase inversion. Standard three-pin XLR connectors remain the universal choice for primary active loudspeaker connections on live soundboards.
Step-by-Step Cable Routing for Stereo and Subwoofer Setups
Begin your setup routine by positioning the active speakers on sturdy stands or designated monitor shelves facing the primary listening area. Ensure that the master faders on your mixing board remain pulled completely down to the minimum position before connecting any audio leads. Take your left main audio cable and connect it securely to the mixer Left Main Out jack until you hear the connector latch click into place. Route the opposite end of this cable directly into the primary audio input on your left active cabinet.
Repeat the identical cabling process for the right channel by running a balanced lead from the mixer Right Main Out to the right active enclosure. If your sound reinforcement system incorporates an active subwoofer, the signal routing alters slightly to manage crossover frequencies. Run both left and right mixer outputs into the stereo inputs of the active subwoofer first. Then run the high-pass outputs from the subwoofer enclosure into your left and right active top cabinets to relieve them of low-frequency reproduction demands.
Auxiliary sends provide another valuable routing option when active speakers serve as stage monitors or secondary fill speakers. Instead of using the main stereo bus, patch a balanced cable from Aux 1 or Aux 2 output into the monitor cabinet input. This routing method allows the sound technician to craft an independent monitor mix tailored specifically for performers without affecting the main audience sound. Keeping auxiliary lines neatly coiled and taped down prevents accidental disconnects and tripping hazards during performances.
The Golden Rule of Power Sequencing
Establishing the correct power sequencing protects delicate speaker voice coils from explosive turn-on transients. Audio mixing consoles, digital processors, and peripheral equalizers frequently emit sudden voltage spikes when their internal power supplies energize. If active speakers are already powered on with open amplifiers, these transient thumps pass straight to the speaker drivers with maximum force. Repeating this mistake can stretch driver suspensions, tear paper cones, or burn delicate high-frequency voice coils.
To avoid turn-on thumps, always power on your audio equipment in the order of the signal path. Turn on all source devices, wireless receivers, and external signal processors first, followed by the mixing console. Allow the mixer meters and internal operating system to stabilize completely before touching the speaker power toggles. Finally, switch on the active speakers and gradually raise their rear-panel gain controls to the recommended unity operating level.
When shutting down your audio system at the end of an event, reverse the power sequence exactly. Turn off the active speakers first so their internal power amplifiers shut down completely and produce no sound. Once the speaker power indicator lights fade out, you can safely power down the mixing board and connected outboard gear. Following this simple shutdown routine eliminates loud pops and preserves the operational lifespan of your powered monitors.
Calibrating Gain Structure and Volume Levels
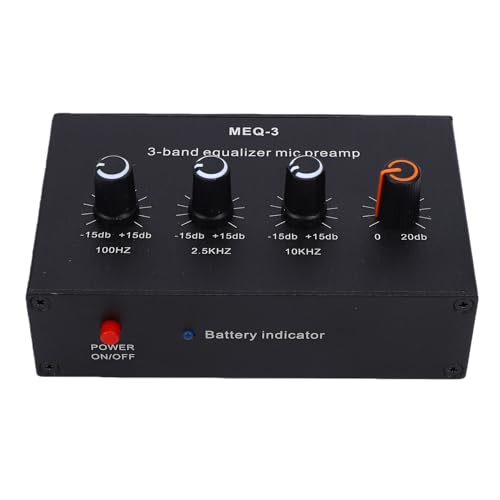
Achieving transparent sound without audible hiss requires disciplined gain staging across every stage of the audio chain. Start by setting the input trim on individual mixer channels so incoming microphones and instruments peak comfortably around zero decibels on channel meters. Dedicated hardware like the Eacam 3 Band EQ Mic Preamp with Adjustable Gain illustrates how preamplification shapes signals before sending them downstream to master buses. Setting channel preamps properly ensures that your mixer operates well above the internal noise floor while retaining sufficient headroom.
Once individual channels sound balanced and clear, position your master stereo faders at their nominal unity gain mark, typically indicated by a zero-decibel label. Next, approach your active speakers and slowly bring up their rear-panel volume potentiometers to achieve the desired acoustic volume in the room. Setting the speaker volume too high while keeping mixer faders near the bottom introduces audible background hiss into the room. Balancing output levels evenly across both the mixer and speaker amplifiers provides clean dynamics and effortless headroom.
Integrating Wireless Links and Remote Audio Feeds
In situations where running physical audio cables presents logistical challenges, wireless audio transmitters provide a versatile routing alternative. Wireless modules such as the Vistreck XLR Wireless Microphone System 2.4GHz can transmit clean line-level audio across open spaces to remote active cabinets or stage wedges. While primarily designed for dynamic microphones, many modern wireless transmitters accept line-level signals when paired with appropriate attenuation pads or mixer aux sends. Operating on reliable digital frequencies eliminates cumbersome cable runs across crowded walkways or doorways.
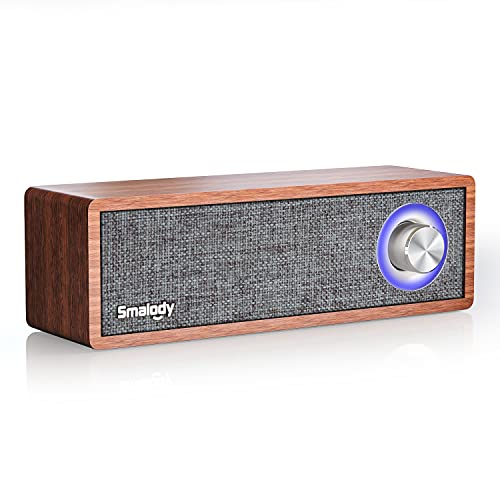
Wireless utility links differ significantly from consumer wireless protocols often found in household entertainment spaces. Listeners exploring casual living room setups might consider standalone Bluetooth audio options for straightforward wireless convenience without professional cabling. Similarly, content creators managing editing workstations often rely on compact desktop audio units for nearfield playback rather than multi-channel consoles. Professional active speakers linked to mixing desks, however, require rock-solid low-latency connections to prevent distracting audio delay during live performances.
Troubleshooting Hums, Ground Loops, and Signal Faults
Unwanted buzzing or sixty-hertz electrical hum is one of the most frequent frustrations when connecting active speakers to mixing boards. This issue usually occurs because the mixer and the active speakers are plugged into separate electrical wall outlets with differing ground potentials. The resulting voltage difference causes ground current to travel along the shielding of your audio cables, creating an audible hum. Plugging all system components into a single dedicated power strip or filtered conditioner often cures ground loop issues immediately.
If electrical hum persists despite sharing a single power circuit, inspect your active speaker backplate for a ground-lift switch. Engaging the ground lift disconnects pin one on the XLR input, severing the ground path between the speaker chassis and the mixer. Never attempt to eliminate ground hum by breaking off the ground pin on an electrical power plug. Removing electrical ground pins creates an extreme shock hazard and violates established electrical safety standards.
Low volume or distorted audio often points to an accidental impedance or sensitivity mismatch between components. If the sound from your active monitors crackles at moderate levels, verify that the speaker input switch is not toggled to microphone sensitivity. Conversely, if you must push the mixer master faders to maximum just to hear faint sound, inspect the cable connectors for damaged solder joints. Swapping cables one channel at a time helps pinpoint whether a defect exists within the cord, mixer output, or speaker amplifier.
Maintaining Cables and Optimizing Speaker Placement
Proper physical placement of active speakers plays an enormous role in stereo imaging and frequency clarity. Angle your left and right active monitors inward toward the listening position to form an equilateral triangle with the operator or primary audience zone. Elevating high-frequency horns to ear level prevents acoustic reflections from floor surfaces and delivers crisp vocal reproduction. Placing cabinets too close to reflective back walls can artificially boost muddy low frequencies and mask mid-range detail.
Active speakers generate substantial heat during extended operation because their amplification modules sit enclosed within the cabinet. Ensure that rear heatsinks and ventilation ports maintain at least several inches of clear airspace away from walls or curtains. Routine maintenance also involves inspecting audio cords for bent pins, cracked boots, or kinked shielding after each tear-down. Winding cables with the over-under method prevents internal conductor fatigue and ensures reliable performance for years to come.
Finalizing your system requires a quick listening verification with a reference audio track before starting any live broadcast or rehearsal. Walk the listening space to ensure that both stereo channels produce balanced acoustic energy and clean transient response. Confirm that mixer meters show healthy signal movement without illuminating red clip indicators during dynamic musical peaks. Taking a few moments to verify cable integrity, power sequencing, and gain balance guarantees dependable sound every time you connect your powered speakers.



Write Your Review
No reviews yet. Be the first to share your experience!