


Audio systems often struggle to reproduce crisp high frequencies when relying solely on full-range drivers or aging factory setups. Muffled vocals, dull cymbal crashes, and muddy dialogue usually signal that an audio setup needs dedicated high-frequency drivers. Learning how to add tweeters to speakers allows listeners to restore upper-range clarity, sharpen stereo imaging, and balance sound reproduction across home audio cabinets or vehicle sound stages. Making this addition requires proper frequency filtering and safe impedance management to keep equipment operating reliably.
Integrating a dedicated high-frequency unit involves matching the driver specifications with an appropriate passive crossover network. Beginners frequently encounter challenges when routing wires or understanding multi-channel terminal boards, which makes reviewing our guide on connecting multi-terminal speakers especially useful before stripping any speaker wire. The following instructions and mounting solutions explain the exact wiring paths, electrical precautions, and hardware adapters required to achieve clean, distortion-free sound.

Complete Guide to Adding Tweeters to Existing Speakers
Adding dedicated high-frequency drivers to an existing speaker system requires matching electrical impedance, filtering low-frequency energy, and anchoring the drivers mechanically. High frequencies provide spatial clarity and vocal definition that standard mid-bass drivers cannot reproduce cleanly on their own. Introducing a tweeter without a suitable filter will damage its delicate voice coil within seconds of receiving full-range power. Proper integration depends on selecting a compatible crossover network, wiring the components correctly, and positioning the drivers to disperse sound toward the listening position.
Core Principles of High-Frequency Driver Integration
Tweeters handle upper audio frequencies that typically range between 2,000 Hz and 20,000 Hz. Because these high frequencies have very short wavelengths, tweeter diaphragms are designed to be extremely lightweight and compact. Larger woofers move substantial air to reproduce bass notes, but their heavy cones cannot vibrate fast enough to deliver detailed high-end sparkle. Adding a specialized driver offloads the upper acoustic spectrum from the primary speaker, allowing each driver to operate within its ideal range.
Direct exposure to deep bass signals causes rapid overheating and mechanical bottoming in small voice coils. Standard woofers handle large voice-coil excursions without physical damage, whereas tweeters have tiny clearances and minimal thermal mass. Installing a frequency barrier ensures that only safe, high-pitched signals reach the delicate driver dome. Balancing the acoustic output between the existing driver and the new tweeter prevents the system from sounding overly piercing or unbalanced.
Protecting Drivers with Passive Crossovers and Bass Blockers
Passive crossovers act as electrical traffic controllers that route audio frequencies to the correct drivers. A simple high-pass filter, commonly called a bass blocker, uses an in-line capacitor wired in series with the positive tweeter terminal. This capacitor presents high resistance to low bass frequencies while allowing high treble frequencies to pass through unobstructed. More advanced systems utilize two-way crossover boxes that simultaneously direct low frequencies to the mid-bass cone and high frequencies to the tweeter.
Crossover slope determines how aggressively low frequencies are reduced below the designated cutoff point. A first-order crossover uses a single capacitor to attenuate frequencies at a rate of 6 decibels per octave. Second-order designs combine a series capacitor with a parallel inductor to achieve a steeper 12 decibels per octave rolloff. Audio builders working with high-output component speakers often rely on second-order networks to maintain clean sound at elevated volume levels without risking thermal stress.
Managing System Impedance and Amplifier Loads
Electrical impedance represents the total resistance an audio amplifier encounters when driving a speaker load. Connecting an unfiltered four-ohm tweeter directly in parallel across an existing four-ohm speaker halves the total resistance to two ohms. Many home stereo receivers and standard vehicle head units cannot sustain two-ohm loads without overheating or triggering internal protection circuits. Excessive current draw from improperly matched loads can permanently degrade output transistors over time.
Incorporating a high-pass crossover network resolves this parallel resistance issue across different frequency bands. The capacitor blocks low frequencies, meaning the amplifier only sees the impedance of the main woofer throughout the bass and midrange spectrum. At upper frequencies, the high-pass filter engages, allowing the amplifier to see the tweeter load where the woofer’s output naturally rolls off. Checking the nominal impedance printed on both drivers guarantees that the combined system stays within the amplifier’s safe operating limits.
Evaluating Enclosure Mounting and Vehicle Dashboard Locations
Physical placement plays a decisive role in how high frequencies disperse throughout a room or vehicle cabin. High frequencies travel in directional beams, meaning listeners notice subtle changes in driver angle and height far more than with omnidirectional bass. Home audio cabinets require mounting the tweeter near ear level on the front baffle to maintain cohesive acoustic imaging. Vehicle interiors present unique acoustic obstacles because glass windshields and angled dashboard grilles reflect sound waves throughout the cabin.
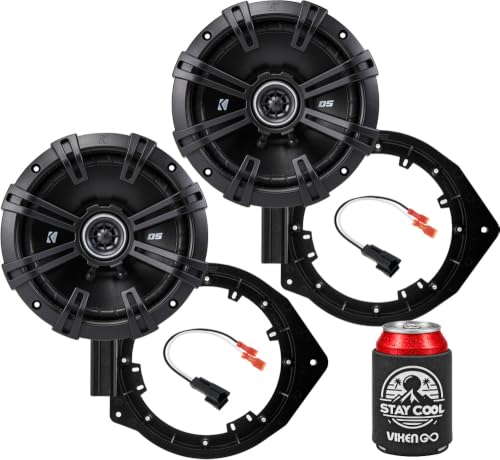
Factory vehicle dashboards often contain shallow speaker cavities with proprietary screw patterns rather than standardized round cutouts. Dedicated mounting hardware, such as the RED WOLF Tweeter Speaker Adapter Spacer Rings 1.5, helps installers secure aftermarket 1.5-inch tweeters directly into factory dashboard locations. These thick ABS plastic spacer rings eliminate vibration, align with original vehicle slots, and prevent the need for permanent modifications to the vehicle structure. Using vehicle-specific brackets ensures a stable fit that prevents loose drivers from rattling during transit.
Custom cabinet builds require routing a circular hole in the front baffle that matches the outer diameter of the tweeter body. Sealing the perimeter with a thin foam gasket or non-hardening putty stops internal air pressure from leaking around the driver frame. Isolating the tweeter cavity is especially important in compact enclosures where the woofer generates substantial internal air compression. Installers comparing different setups frequently evaluate aftermarket vehicle speaker replacements to determine whether factory wiring and mounting depths accommodate larger high-frequency domes.
Selecting Parallel Wiring Versus Component Distribution Networks
Parallel wiring represents the most straightforward method for integrating an add-on tweeter into an existing enclosure. In this configuration, the positive and negative input leads split to feed both the main driver and the filtered tweeter circuit simultaneously. The inline capacitor attaches directly along the positive branch to intercept full-range power before it reaches the voice coil. This streamlined arrangement works well when retrofitting older bookshelf cabinets or adding auxiliary dash tweeters to factory door speakers.
Dedicated component crossover networks provide superior frequency separation by splitting the incoming audio signal into dedicated low-pass and high-pass channels. The amplifier connects directly to the crossover input terminals, while independent output pairs run to the woofer and tweeter separately. This isolated routing stops the woofer from attempting to reproduce frequencies beyond its mechanical capabilities, which reduces intermodulation distortion. While dedicated crossover boxes require more mounting space and additional wiring runs, they deliver noticeably cleaner sound separation across complex musical arrangements.
Step-by-Step Installation for Home Speaker Cabinets
Disconnect the existing speaker from the amplifier or receiver before removing any components or opening the cabinet. Unscrew the primary woofer carefully to gain access to the interior wiring, dampening material, and existing terminal cup. Inspect the internal chamber to verify that there is adequate clearance behind the intended tweeter mounting spot. Confirming that structural braces or crossover circuit boards do not block the chosen location prevents costly cutting mistakes.
Mark the center point on the front baffle and cut the circular cutout using a hole saw or rotary tool equipped with a circle guide. Clean all sawdust thoroughly from the enclosure interior so foreign debris does not contaminate the magnetic gap of the woofer voice coil. Solder the inline capacitor to the positive terminal of the tweeter, insulating the exposed metallic leads with heat-shrink tubing. Running fresh 16-gauge or 18-gauge oxygen-free copper wire from the cabinet terminal cup ensures clean signal transfer without resistance losses.
Press the pre-wired tweeter into the baffle opening, ensuring that the mounting flange sits completely flush against the cabinet face. Secure the driver using appropriate wood screws, tightening each fastener in an alternating pattern to distribute pressure evenly across the frame. Reinstall the internal acoustic dampening material, taking care not to pinch any new wiring against internal cabinet edges. Replace the main woofer, reconnect the speaker terminals to your amplifier, and test playback at low volume levels before increasing output.
Step-by-Step Installation for Vehicle Dashboards
Disconnect the negative vehicle battery terminal to prevent electrical shorts or airbag fault codes while working around the instrument panel. Gently pry off the dashboard speaker grilles using a non-marring nylon trim tool to avoid scratching interior plastics. Unbolt the factory dash speakers, release the wiring harness clips, and lift the original drivers away from the dash cavity. Inspect the factory wiring to identify the positive and negative signal leads feeding each side of the vehicle.
Mount the aftermarket high-frequency driver into the matching adapter spacer ring to duplicate the factory mounting geometry. Rigid ABS spacer rings fit directly into original dash slots, utilizing existing factory screws without requiring custom bracket fabrication. Solder or crimp the in-line bass blocker into the positive speaker lead, protecting every electrical splice with heavy heat-shrink tubing. Connecting a plug-and-play wiring adapter directly to the factory harness avoids cutting the original vehicle wiring loom.
Lower the assembled adapter bracket and tweeter into the dashboard cavity, ensuring that the wiring drops cleanly without binding against structural dash supports. Fasten the bracket using the factory screws, tightening them firmly to prevent vibration while avoiding overtightening into plastic clips. Reconnect the negative vehicle battery cable and power on the audio system to confirm sound output from both dashboard corners. Snap the factory speaker grilles back into place once you verify that the audio signal remains crisp and balanced.
Polarity Matching, Phase Alignment, and Level Adjustment
Matching electrical polarity between drivers keeps audio signals moving in acoustic harmony. When the positive output of an amplifier drives the positive terminal of both woofer and tweeter, the diaphragms move in the same relative direction. Crossover networks introduce electrical phase shifts that can cause acoustic cancellation at the crossover frequency where both drivers overlap. If vocal tracks sound hollow or distant, reversing the positive and negative leads on the tweeter can instantly restore natural acoustic warmth.
Tweeters frequently exhibit higher sensitivity ratings than companion woofers, which can make high frequencies sound disproportionately loud. An overly bright tweeter creates listener fatigue and overwhelms midrange vocals during everyday listening sessions. An in-line resistive attenuation network, commonly called an L-pad, reduces signal voltage while maintaining a constant impedance load for the crossover filter. Installing fixed ceramic resistors along the tweeter line brings high-frequency output into perfect balance with the rest of the sound stage.
Troubleshooting Distortion, Sibilance, and Weak Treble
Unwanted distortion from an add-on tweeter usually points to inadequate low-frequency filtering or amplifier clipping. If the driver buzzes or sounds strained during deep bass passages, the capacitor value may be too large, allowing lower midrange energy to enter the voice coil. Replace the capacitor with a smaller microfarad rating to shift the high-pass cutoff point higher up the frequency spectrum. Inspecting wire terminals for loose crimps or frayed copper strands eliminates intermittent crackling noises caused by vehicle movement or speaker vibration.
Harsh sibilance, characterized by sharp whistling or unnatural hissing on vocal words containing the letter S, indicates excessive high-frequency peaking. Adjusting receiver equalizer settings or angling the tweeters slightly away from direct ear alignment often softens this aggressive treble peak. Complete loss of sound from the tweeter suggests that an electrical overload melted the delicate voice coil wire or that a solder joint fractured under thermal stress. Testing the driver with a digital multimeter verifies whether the voice coil retains continuity or requires full replacement.
Verification Steps and Long-Term Audio Care
Verify installation integrity by auditioning several well-recorded acoustic and vocal tracks across varied volume levels. Listen closely around the perimeter of the driver frame to ensure that no air leaks or loose hardware generate buzzing rattles during dynamic passages. Place a hand on the amplifier chassis after thirty minutes of moderate playback to confirm that the amplifier runs at a normal operating temperature. Stable thermal performance proves that the combined impedance of your woofers and newly integrated tweeters remains well within manufacturer safety tolerances.
Periodic maintenance involves checking mounting hardware for tightness and clearing dust grilles from obstructing sound output. In vehicle installations, seasonal temperature swings can loosen plastic push pins or mounting screws inside dashboard cavities. Re-inspecting connections annually ensures that your soldered splices and adapter brackets remain secure through years of driving. Thoughtful installation, reliable crossover protection, and secure mounting brackets guarantee that your speakers continue delivering pristine high-frequency sound without unexpected hardware failures.





Write Your Review
No reviews yet. Be the first to share your experience!